Image In-painting with OpenVINO™
This notebook demonstrates how to use an image in-painting model with
OpenVINO. We use GMCNN
model from Open Model
Zoo. This model
is able to create something very similar to the original image given a
tampered image. The Following pipeline will be used in this notebook.

import sys
from pathlib import Path

import cv2
import matplotlib.pyplot as plt
import numpy as np
from openvino.runtime import Core

sys.path.append("../utils")
import notebook_utils as utils
Download the Model
Models can be downloaded with omz_downloader. omz_downloader is
a command-line tool for downloading models from the Open Model Zoo.
gmcnn-places2-tf is the omz name for the considered model. You can
find the names of all available models
here
and
here.
The selected model comes from the public directory, which means it must
be converted into Intermediate Representation (IR). This step is skipped
if the model is already downloaded.
# Directory where model will be downloaded
base_model_dir = "model"
# Model name as named in Open Model Zoo
model_name = "gmcnn-places2-tf"

model_path = Path(f"{base_model_dir}/public/{model_name}/{model_name}/frozen_model.pb")
if not model_path.exists():
    download_command = f"omz_downloader " \
                       f"--name {model_name} " \
                       f"--output_dir {base_model_dir}"
    ! $download_command
else:
    print("Already downloaded")
################|| Downloading gmcnn-places2-tf ||################

========== Downloading model/public/gmcnn-places2-tf/gmcnn-places2-tf.zip


========== Unpacking model/public/gmcnn-places2-tf/gmcnn-places2-tf.zip
Convert Tensorflow model to OpenVINO IR format
The pre-trained model is in TensorFlow format. To use it with OpenVINO,
we need to convert it to OpenVINO IR format. To do this, we use Model
Converter (omz_converter), which is another command-line tool. We
specify the precision for FP32 but it can be FP16 as well. This step is
also skipped if the model is already converted.
precision = "FP32"
ir_path = Path(f"{base_model_dir}/public/{model_name}/{precision}/{model_name}.xml")

# Run Model Optimizer if the IR model file does not exist
if not ir_path.exists():
    print("Exporting TensorFlow model to IR... This may take a few minutes.")
    convert_command = f"omz_converter " \
                      f"--name {model_name} " \
                      f"--download_dir {base_model_dir} " \
                      f"--precisions {precision}"
    ! $convert_command
else:
    print("IR model already exists.")
Exporting TensorFlow model to IR... This may take a few minutes.
========== Converting gmcnn-places2-tf to IR (FP32)
Conversion command: /opt/hostedtoolcache/Python/3.8.12/x64/bin/python -- /opt/hostedtoolcache/Python/3.8.12/x64/bin/mo --framework=tf --data_type=FP32 --output_dir=model/public/gmcnn-places2-tf/FP32 --model_name=gmcnn-places2-tf --input=Placeholder,Placeholder_1 --input_model=model/public/gmcnn-places2-tf/gmcnn-places2-tf/frozen_model.pb --output=Minimum '--layout=Placeholder(NHWC),Placeholder_1(NHWC)' '--input_shape=[1, 512, 680, 3],[1, 512, 680, 1]'

Model Optimizer arguments:
Common parameters:
    - Path to the Input Model:  /home/runner/work/openvino_notebooks/openvino_notebooks/notebooks/215-image-inpainting/model/public/gmcnn-places2-tf/gmcnn-places2-tf/frozen_model.pb
    - Path for generated IR:    /home/runner/work/openvino_notebooks/openvino_notebooks/notebooks/215-image-inpainting/model/public/gmcnn-places2-tf/FP32
    - IR output name:   gmcnn-places2-tf
    - Log level:    ERROR
    - Batch:    Not specified, inherited from the model
    - Input layers:     Placeholder,Placeholder_1
    - Output layers:    Minimum
    - Input shapes:     [1, 512, 680, 3],[1, 512, 680, 1]
    - Source layout:    Not specified
    - Target layout:    Not specified
    - Layout:   Placeholder(NHWC),Placeholder_1(NHWC)
    - Mean values:  Not specified
    - Scale values:     Not specified
    - Scale factor:     Not specified
    - Precision of IR:  FP32
    - Enable fusing:    True
    - User transformations:     Not specified
    - Reverse input channels:   False
    - Enable IR generation for fixed input shape:   False
    - Use the transformations config file:  None
Advanced parameters:
    - Force the usage of legacy Frontend of Model Optimizer for model conversion into IR:   False
    - Force the usage of new Frontend of Model Optimizer for model conversion into IR:  False
TensorFlow specific parameters:
    - Input model in text protobuf format:  False
    - Path to model dump for TensorBoard:   None
    - List of shared libraries with TensorFlow custom layers implementation:    None
    - Update the configuration file with input/output node names:   None
    - Use configuration file used to generate the model with Object Detection API:  None
    - Use the config file:  None
OpenVINO runtime found in:  /opt/hostedtoolcache/Python/3.8.12/x64/lib/python3.8/site-packages/openvino
OpenVINO runtime version:   2022.1.0-7019-cdb9bec7210-releases/2022/1
Model Optimizer version:    2022.1.0-7019-cdb9bec7210-releases/2022/1
[ SUCCESS ] Generated IR version 11 model.
[ SUCCESS ] XML file: /home/runner/work/openvino_notebooks/openvino_notebooks/notebooks/215-image-inpainting/model/public/gmcnn-places2-tf/FP32/gmcnn-places2-tf.xml
[ SUCCESS ] BIN file: /home/runner/work/openvino_notebooks/openvino_notebooks/notebooks/215-image-inpainting/model/public/gmcnn-places2-tf/FP32/gmcnn-places2-tf.bin
[ SUCCESS ] Total execution time: 19.03 seconds.
[ SUCCESS ] Memory consumed: 547 MB.
It's been a while, check for a new version of Intel(R) Distribution of OpenVINO(TM) toolkit here https://software.intel.com/content/www/us/en/develop/tools/openvino-toolkit/download.html?cid=other&source=prod&campid=ww_2022_bu_IOTG_OpenVINO-2022-1&content=upg_all&medium=organic or on the GitHub*
[ INFO ] The model was converted to IR v11, the latest model format that corresponds to the source DL framework input/output format. While IR v11 is backwards compatible with OpenVINO Inference Engine API v1.0, please use API v2.0 (as of 2022.1) to take advantage of the latest improvements in IR v11.
Find more information about API v2.0 and IR v11 at https://docs.openvino.ai
Load the model
Now we will load the IR model. Then:
Initialize OpenVINO Runtime (Core)
Read the network from .bin and.xml files (weights and architecture)
Compile the model for the “CPU”
Get input and output nodes.
Only a few lines of code are required to run the model. Let’s see them.
core = Core()

# Read the model.xml and weights file
model = core.read_model(model=ir_path)
# Load the model on to the CPU
compiled_model = core.compile_model(model=model, device_name="CPU")
# Store the input and output nodes
input_layer = compiled_model.input(0)
output_layer = compiled_model.output(0)
Determine the input shapes of the model
Note that both input shapes are the same however, the second input has a channel of 1 (monotone).
N, H, W, C = input_layer.shape
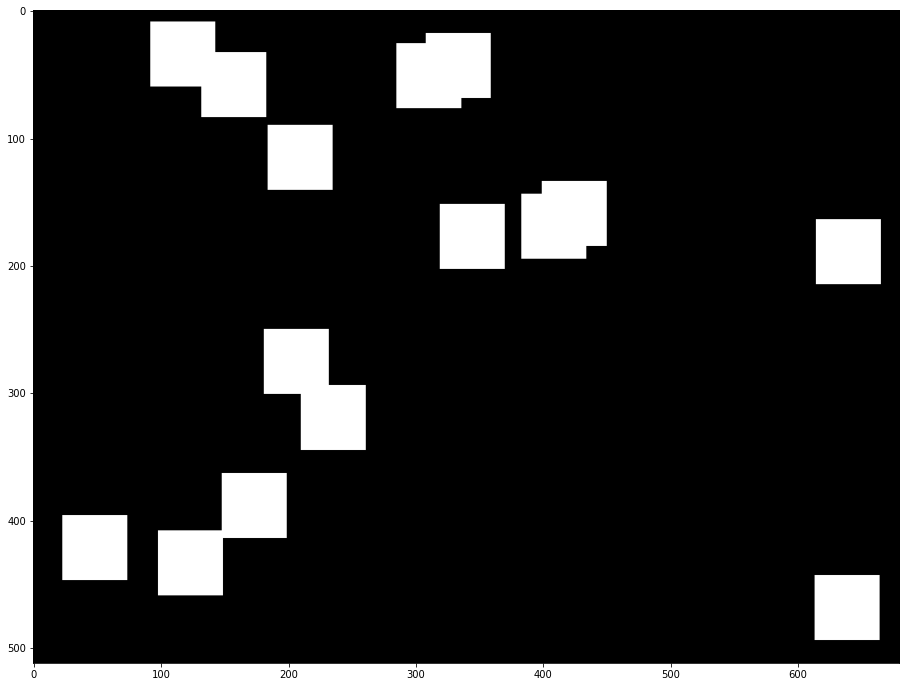
Create a square mask
Next, we will create a single channeled mask that will be laid on top of the original image.
def create_mask(image_width, image_height, size_x=30, size_y=30, number=1):
    """
    Create a square mask of defined size on a random location

    :param: image_width: width of the image
    :param: image_height: height of the image
    :param: size: size in pixels of one side
    :returns:
            mask: grayscale float32 mask of size shaped [image_height, image_width, 1]
    """

    mask = np.zeros((image_height, image_width, 1), dtype=np.float32)
    for _ in range(number):
        start_x = np.random.randint(image_width - size_x)
        start_y = np.random.randint(image_height - size_y)
        cv2.rectangle(img=mask,
                      pt1=(start_x, start_y),
                      pt2=(start_x + size_x, start_y + size_y),
                      color=(1, 1, 1),
                      thickness=cv2.FILLED)
    return mask
# Generate a square mask of size WxH with number of "holes"
mask = create_mask(image_width=W, image_height=H, size_x=50, size_y=50, number=15)
# This mask will be laid over the input image as noise
plt.figure(figsize=(16, 12))
plt.imshow(cv2.cvtColor(mask, cv2.COLOR_BGR2RGB));

Load and Resize the Image
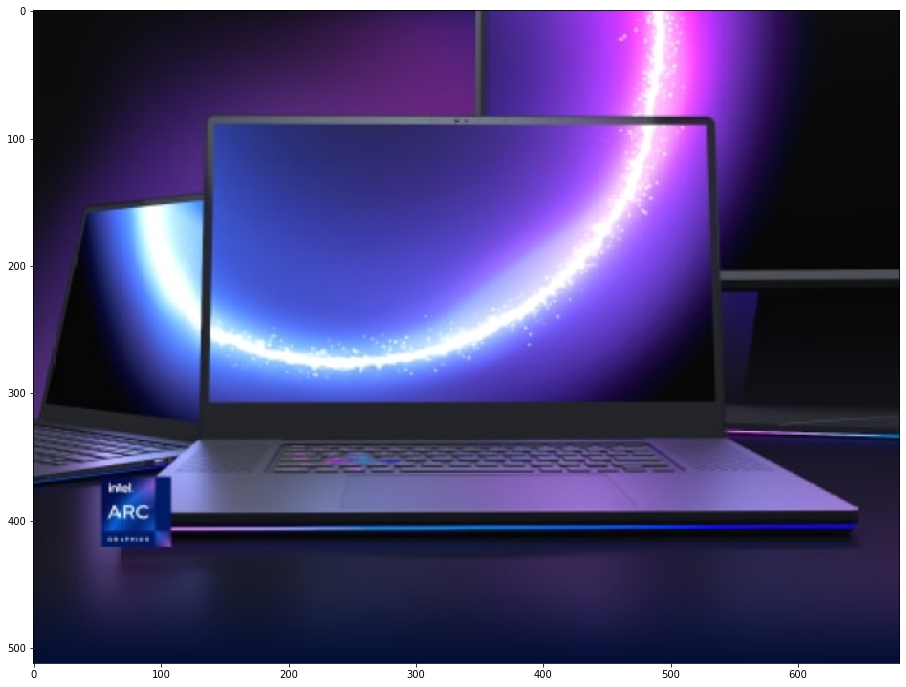
This image will be altered using the mask. You can process any image you like. Just put a URL here.
# Download an image
url = "https://www.intel.com/content/dam/www/central-libraries/us/en/images/arc-home-hero-128.png.rendition.intel.web.480.360.png"
image_file = utils.download_file(
    url, filename="laptop.png", directory="data", show_progress=False, silent=True, timeout=30
)
assert Path(image_file).exists()

# Read the image
image = cv2.imread("data/laptop.png")
# Resize image to meet network expected input sizes
resized_image = cv2.resize(src=image, dsize=(W, H), interpolation=cv2.INTER_AREA)
plt.figure(figsize=(16, 12))
plt.imshow(cv2.cvtColor(resized_image, cv2.COLOR_BGR2RGB));

Generating the Masked Image
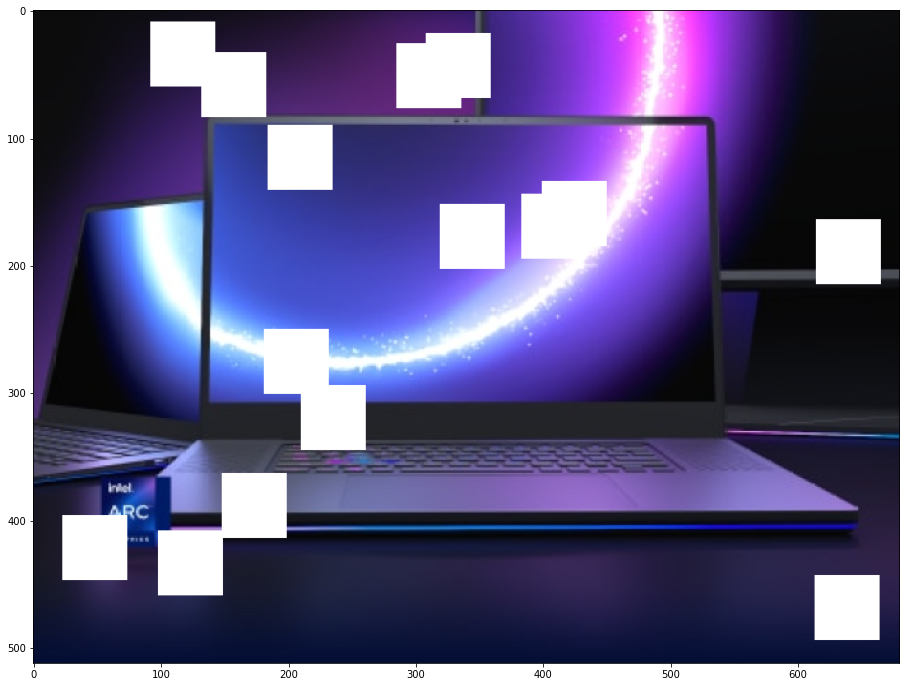
This multiplication of the image and the mask gives us the result of the
masked image layered on top of the original image. The masked_image
will be the first input to the GMCNN model.
# Generating masked image
masked_image = (resized_image * (1 - mask) + 255 * mask).astype(np.uint8)
plt.figure(figsize=(16, 12))
plt.imshow(cv2.cvtColor(masked_image, cv2.COLOR_BGR2RGB));

Preprocessing
The model expects the input dimensions to be NHWC.
masked_image.shape = (512,680,3) —–> model expects = (1,512,680,3)
resized_mask.shape = (512,680,1) —–> model expects = (1,512,680,1)
masked_image = masked_image[None, ...]
mask = mask[None, ...]
Inference
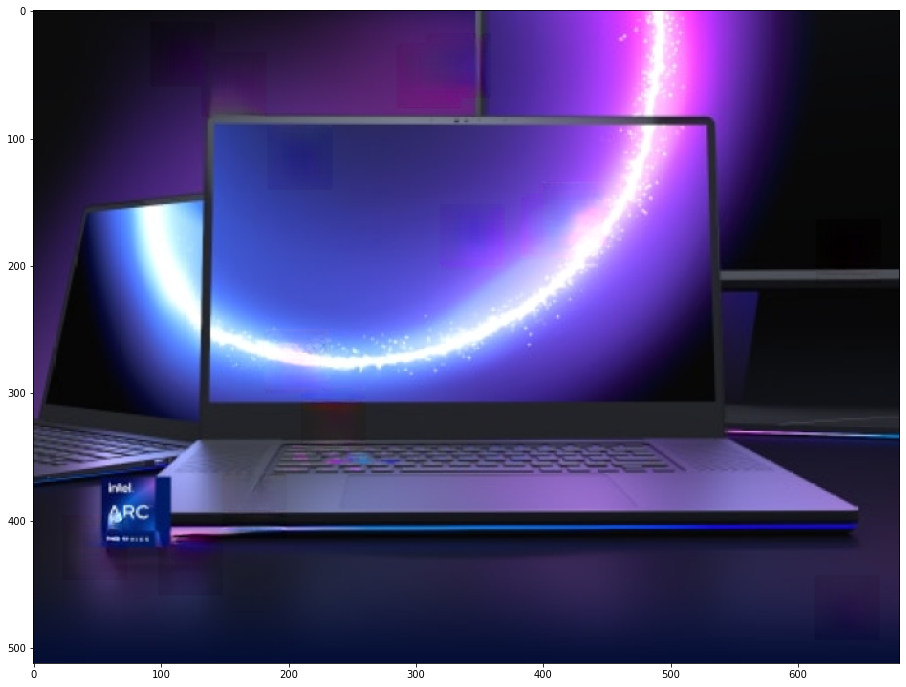
Run the inference with given masked image and mask. Then show the restored image.
result = compiled_model([masked_image, mask])[output_layer]
result = result.squeeze().astype(np.uint8)
plt.figure(figsize=(16, 12))
plt.imshow(cv2.cvtColor(result, cv2.COLOR_BGR2RGB))
<matplotlib.image.AxesImage at 0x7f3e6c188fd0>

Save restored image
Save restored image to data directory to download it.
cv2.imwrite("data/laptop_restored.png", result)
True