Register Remote Target in DL Workbench
Set up your remote target, then follow the instructions below:
Step 1 : Go to the Create Project page.
Step 2 : Select Add Remote Target next to the Environment table.
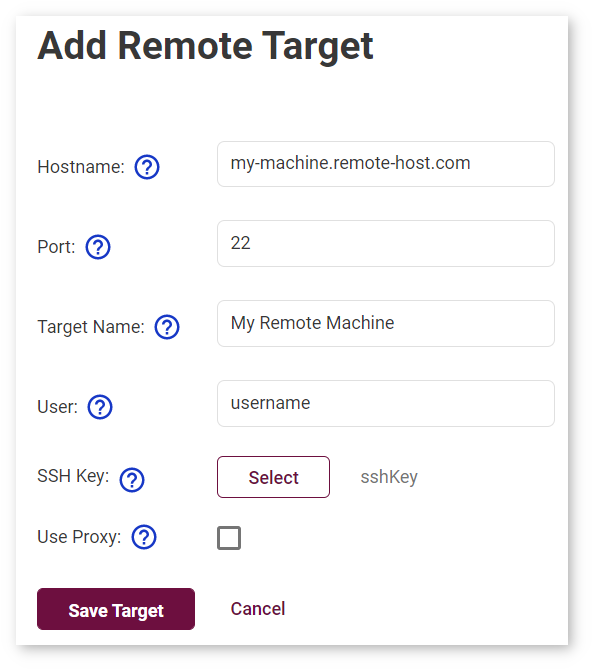
Step 3 : Fill in the fields shown in the figure and table below. If you are behind a corporate proxy, select the Use Proxy box and provide proxy information.

Field |
Explanation |
|---|---|
Hostname |
Name of the host or the IP address for the remote machine. Example: my-machine.remote-host.com |
Port |
Port for the SSH connection to the remote machine. Default: 22 |
Target Name |
Alias name of the remote machine in the DL Workbench. Example: My Machine |
User |
User name for the passwordless SSH connection to the remote machine. If you use GPU or MYRIAD devices, sudo privileges for the user are required. Example: root |
SSH Key |
Private SSH key for authenticated connection to the remote machine. It is generated with the public key that you copy to the remote machine. |
HTTP, HTTPS Proxy Hostname |
Hostname or IP address for the proxy server connection. Required if the remote machine is behind a proxy. |
HTTP, HTTPS Proxy Port |
Port for the proxy server connection. Required if the remote machine is behind a proxy. |
Proxy-server Username |
User name for the proxy server connection. Required if your proxy server uses a password. |
Proxy-server Password |
Password for the proxy server connection. Required if your proxy server uses a password. |
Step 4 : Click Add. The machine is listed to the Target Machines table with a status of Configuring :

The Configuration Status and Connection Status tables show you the configuration progress. Click Details to review a log at each stage.

See Troubleshooting to address a Warning or Failure :
Warning indicates issues that might limit your actions. Warnings do not prevent work with remote targets. Refer to Troubleshooting to fix an issue:

Failure indicates issues that prevent using the remote target. Refer to Troubleshooting to fix an issue:
