Troubleshooting
If you encounter an issue when running the DL Workbench, follow the steps below:
Refresh the page.
If it does not help, search for the solution among the issues listed on this page.
If you could not find the issue on this page or the proposed solution did not work for you, download logs and post a question at the Intel Community Forum. Describe your issue providing the details necessary to reproduce it and attach screenshots, if possible.
If you run the DL Workbench in the Intel® DevCloud for the Edge, see Troubleshooting for DL Workbench in the DevCloud.
How to Investigate an Issue
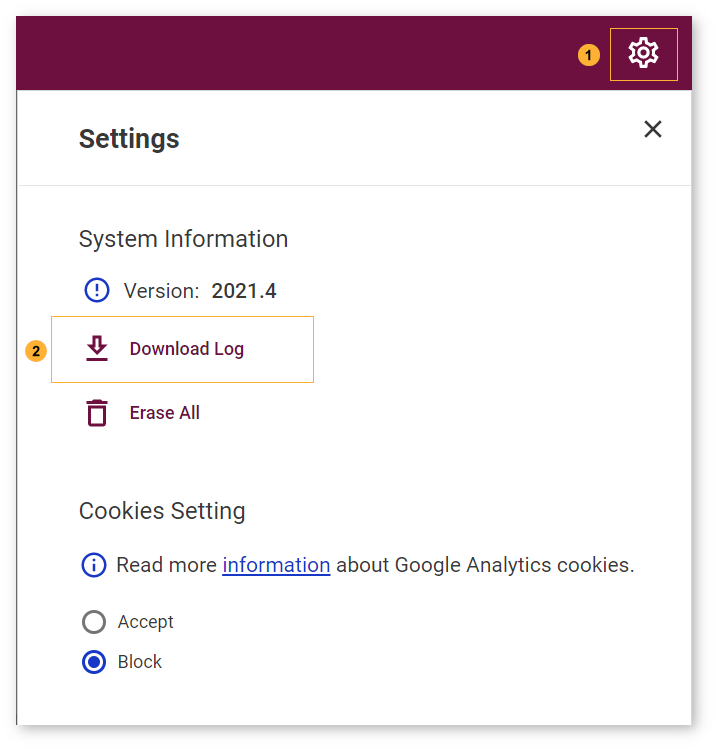
To learn more about an error, download a .txt file with server logs. Click the user icon in the upper-right corner to see the Settings, then click Download Log :

Note
Server logs contain sensitive information like data on your models. If you do not wish to share this information, attach only the RUN COMMAND part.
If you cannot copy the logs from the DL Workbench UI, use the following command to download logs:
docker cp workbench:/home/workbench/.workbench/server.log server.logIf the issue persists, post a question on Intel Community Forum and attach the server logs. If the issue is not reproduced in the container, feel free to post a question as well. For more information, go to the Enter Docker Container section of the Work with Docker Container page.
Most Frequent Issues
General
Remote Target
General Issues
Docker Container Stops
This error appears due to the incorrect permissions that are set for the configuration folder on a host machine with Linux* or macOS*.
The indicator of the problem is the following output in the terminal:
[tasks]
  . app.main.tasks.task.Task
  . celery.accumulate
  . celery.backend_cleanup
  . celery.chain
  . celery.chord
  . celery.chord_unlock
  . celery.chunks
  . celery.group
  . celery.map
  . celery.starmap

Error: No nodes replied within time constraint.
Celery is not ready at the moment. Retry in 2 seconds

username@host:~$
To resolve the problem, follow the steps below:
Create the configuration folder with the correct permissions manually. Run the following command in your terminal:
Note
If the configuration folder already exists, delete it before proceeding.
mkdir -p -m 777 ~/.workbench
Copy required DL Workbench assets into it. Assign this path to the
--assets-directoryargument in the script you used to install the application.
Note
If you use a non-default configuration directory, replace
~/.workbenchwith it.
Creating the directory with the
-m 777mode makes the directory accessible to ALL users for reading, writing and executing.
Incompatible Model and Dataset

This error appears due to model and dataset type incompatibility.
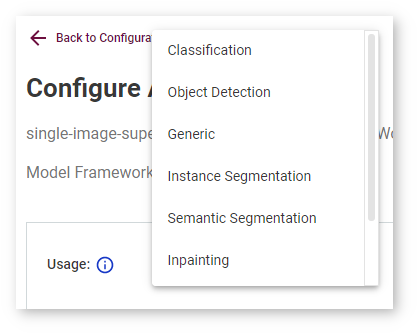
Make sure you select a correct model task in the Accuracy Settings step.

Also, check that you do not select a VOC Object-Detection dataset for a Classification model, or an ImageNet Classification dataset for an Object-Detection model.
Open Model Zoo Models Do Not Get Imported
If you cannot import models from the Open Model Zoo, you may need to specify your proxy settings when running a Docker container. To do that, refer to Advanced Configurations.
If you cannot download a model from the Open Model Zoo because its source is not available, you can select a different model of the same use case from another source. If you have a problem with connectivity, you may need to check the internet connection and specify your proxy settings.
Nginx Fails to Start
The error shown below may appear due to incorrect user permissions set for an SSL key and/or SSL certificate.

Check the key and certificate permissions. They must have at least **4 mode, which means reading for others group.
To resolve the problem, run the command below in your terminal and then restart the DL Workbench.
Note
The command makes the provided files accessible for reading to all users.
chmod 004 <path-to-key>/key.pem
chmod 004 <path-to-certificate>/certificate.pem
Unable to Upgrade the DL Workbench to the Highest Version
When the DL Workbench is unable to upgrade to the highest version, you can run the highest DL Workbench version without your data or use the previous DL Workbench version to keep your data in the tool. Choose the solution that suits you best:
Use the highest DL Workbench version and totally remove the previous data including your models, datasets, and performance information. Run the following commands in your terminal.
Remove the previous folder or volume with data:
Linux and macOS:
rm -rf ~/.workbench/\*Windows:
docker volume rm workbench_volumeanddocker volume create workbench_volume
Run a new DL Workbench container.
Use the highest DL Workbench version and save the previous data locally, which however will not make the data available in the tool. Run the following commands in your terminal.
Create a new local directory or volume:
Linux and macOS:
mkdir -p -m 777 ~/.workbench_newWindows:
docker volume create workbench_volume_new
Run a new DL Workbench contatiner with the new local folder or volume mounted to the container.
Save the previous data and use the previous version of DL Workbench. Open your terminal and run the starting command that you used previously, but specifying the tag of the previous version.
Remote Target Issues
Remote Target Warning: No Sudo Privileges
If the specified user has no sudo privileges on the remote machine, only a CPU device is available for inference. If you want to profile on GPU and MYRIAD devices, follow the steps described in the Configure Sudo Privileges without Password section of Set Up Remote Target.
Remote Target Warning: GPU Drivers Setup Fails
If the automatic setup of GPU drivers fails, install dependencies on the remote target machine manually as described in the Install Dependencies on Remote Target Manually section of Set Up Remote Target.
Remote Target Failure: Authentication Error

Check the following parameters if you can not authenticate to the remote machine:
Hostname
Make sure you provide the hostname of your machine or its IPv4 address.
Examples:
Hostname: host.com, sub-domain1.sub-domain2.host.com
IP address: 192.0.2.235
User Name
Check the user name for the SSH connection to the remote machine.
Examples:
root
username
SSH Key
Make sure you upload the id_rsa key generated when you set up the remote target.
You should upload the :ref:``id_rsa` key <doxid-workbench_docs__workbench__d_g__setup__remote__target>`, which contains a set of symbols surrounded by the lines shown below:
-----BEGIN RSA PRIVATE KEY----------END OPENSSH PRIVATE KEY-----Remote Target Failure: Python* Version Is Not Supported
Make sure you have Python* 3.6, 3.7, or 3.8 on your target machine. See Set Up Remote Target for dependencies instructions and the full list of remote target requirements.
Remote Target Failure: Pip* Version Is Not Supported
Make sure you have pip* 18 on your target machine. See Set Up Remote Target for dependencies instructions and the full list of remote target requirements.
Remote Target Failure: OS Version Is Not Supported
Make sure you have Ubuntu* 18.04 on your target machine. See Set Up Remote Target for the full list of remote target requirements.
Remote Target Failure: No Internet Connection
This failure may occur due to incorrectly set or missing proxy settings. Set the proxies as described in Register Remote Target in the DL Workbench. To update remote machine information, see Profile with Remote Machine